How to Add a Border to a Picture on Mac Preview
You can crop an image to remove something in the background, delete someone in the foreground, or just rid the photo of extra stuff you don't want. And if you own a Mac, it can be much easier to edit images than on your iPhone's smaller screen.
Luckily, you don't need any fancy software or an app to do simple things to an image on your Mac. Here, we'll show you how to use your Mac's built-in tools to crop an image: Preview, Photos, and Quick Look.
Method 1: with Preview
Preview is your Mac's default image viewer. So of course you have a tool to crop a photo or other type of image with it.
Remember, you can create a duplicate of the image before you crop it if you want to keep the original intact.
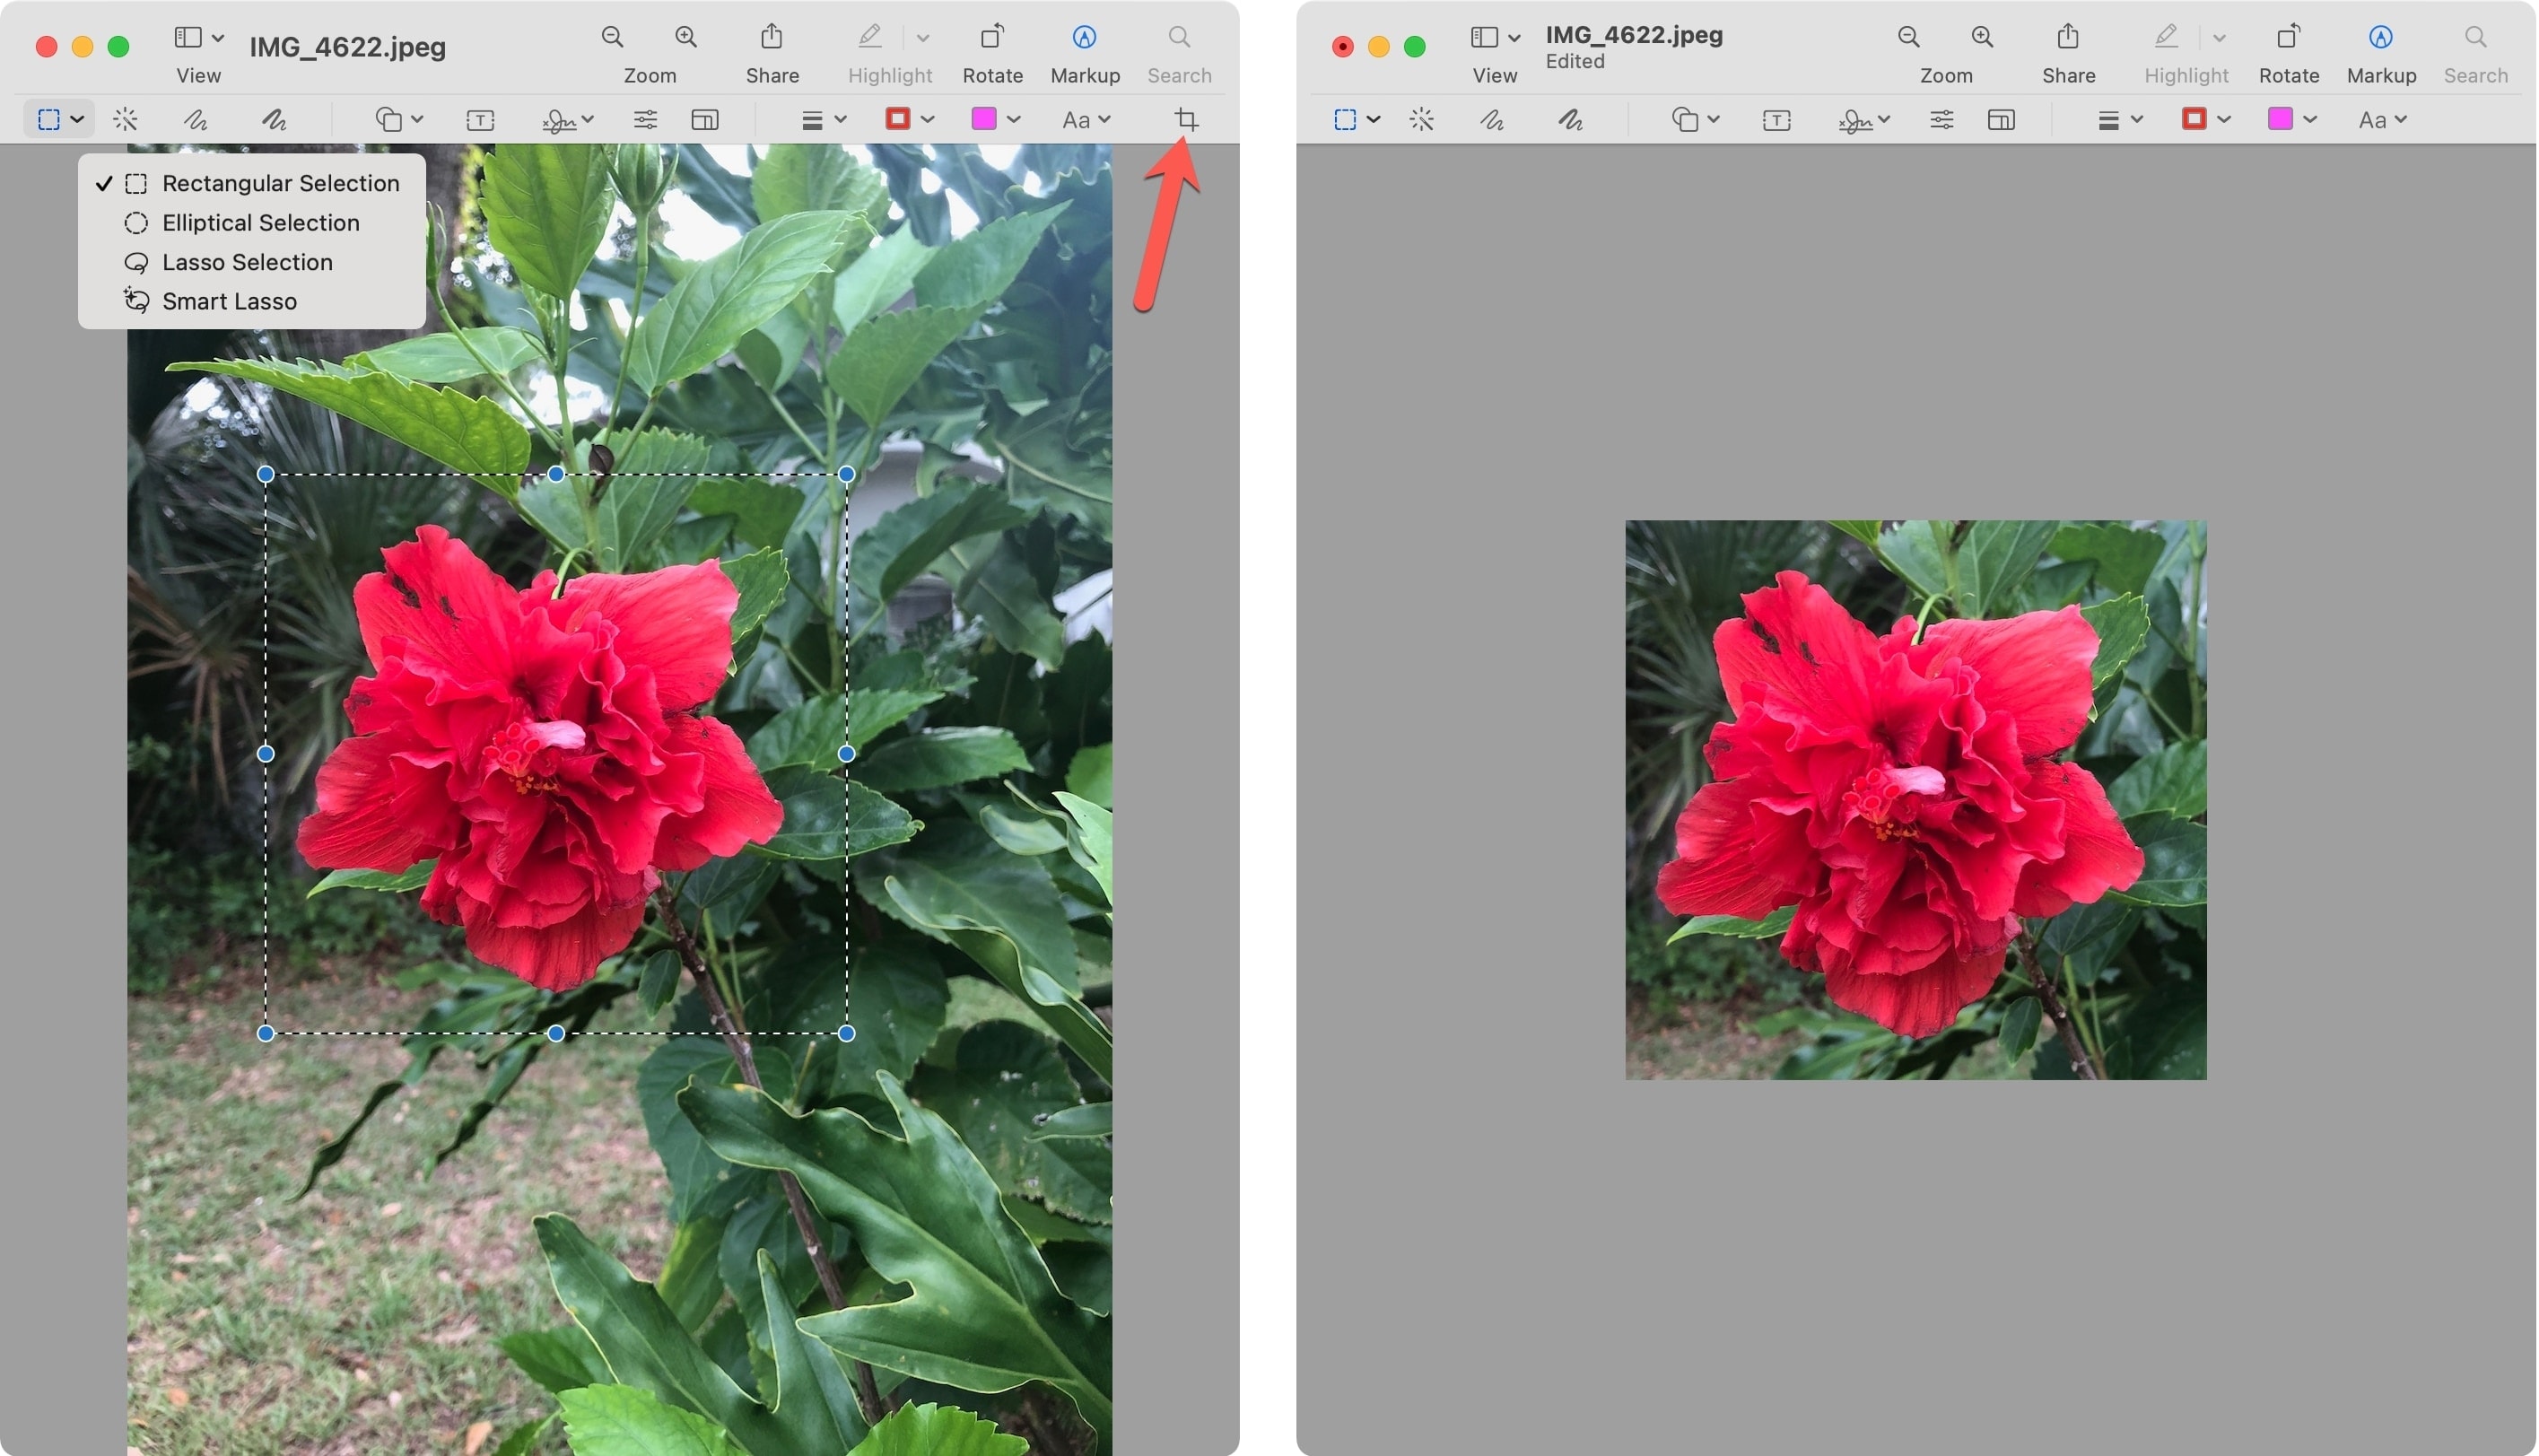
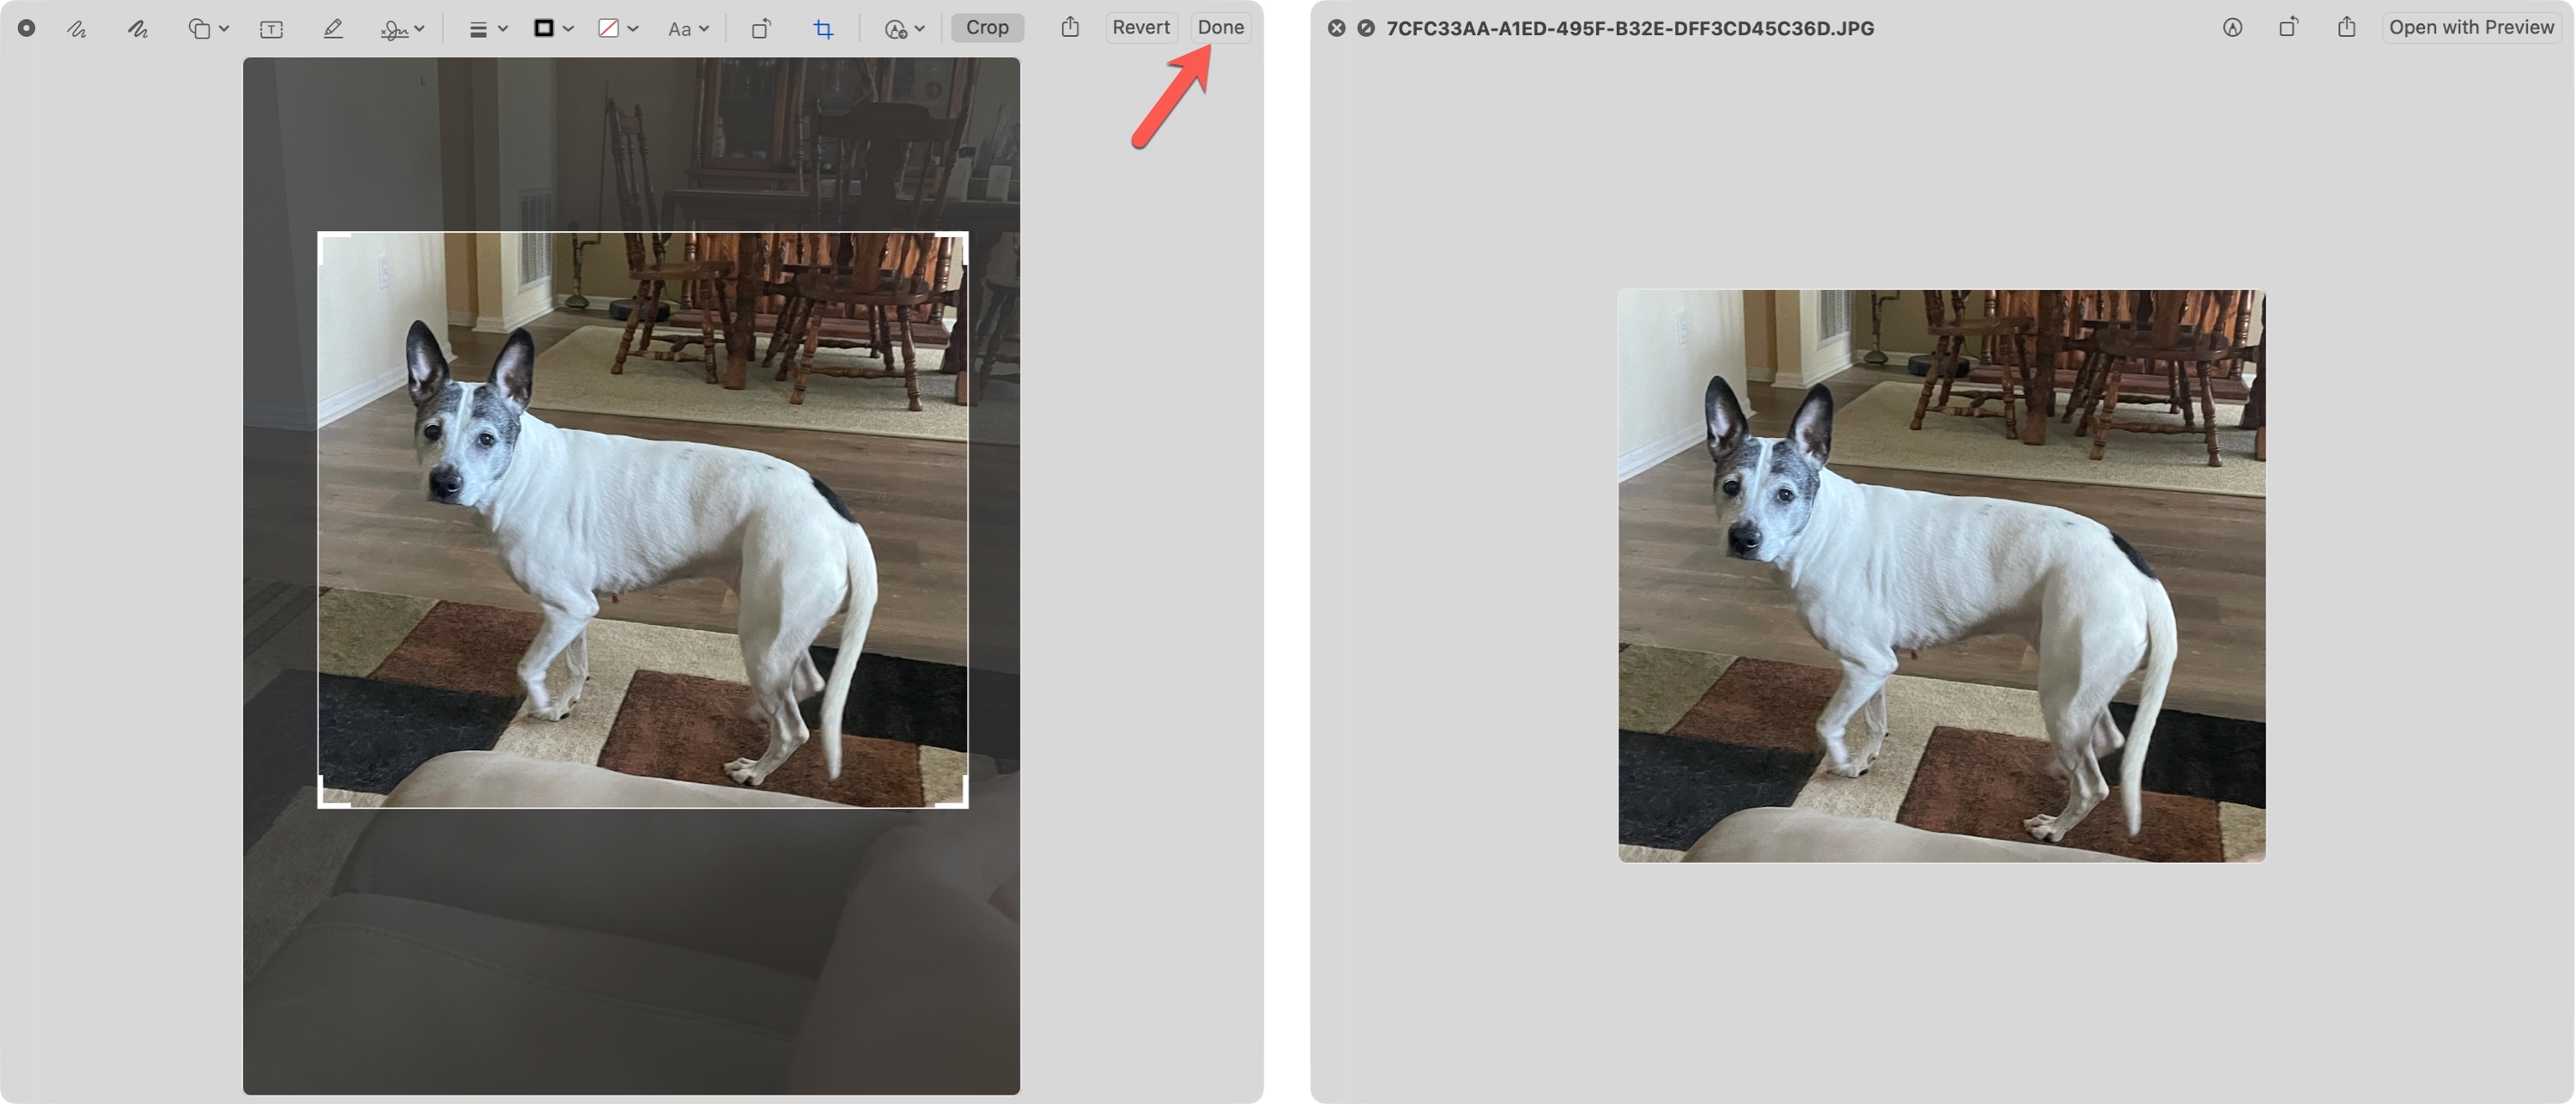
1) Open your image in Preview and select Markup from the toolbar.
2) On the far left, click the Selection Tool button and pick a shape for the tool.
3) Use the selection tool to capture the part of your image that you want to keep. Once you place the tool on your image, drag a border or corner to resize the selected area.
4) You'll see the Crop button appear on the far right, so click it.
And that's all there is to it! It's a quick and painless task to crop an image with Preview on your Mac.
Method 2: with the Photos app
If you have a photo or screenshot from another device that you want to crop and use iCloud to sync Photos, then you can use the editing tool built right into Photos on Mac. This is a great way to crop an image from your iPhone on a larger screen.
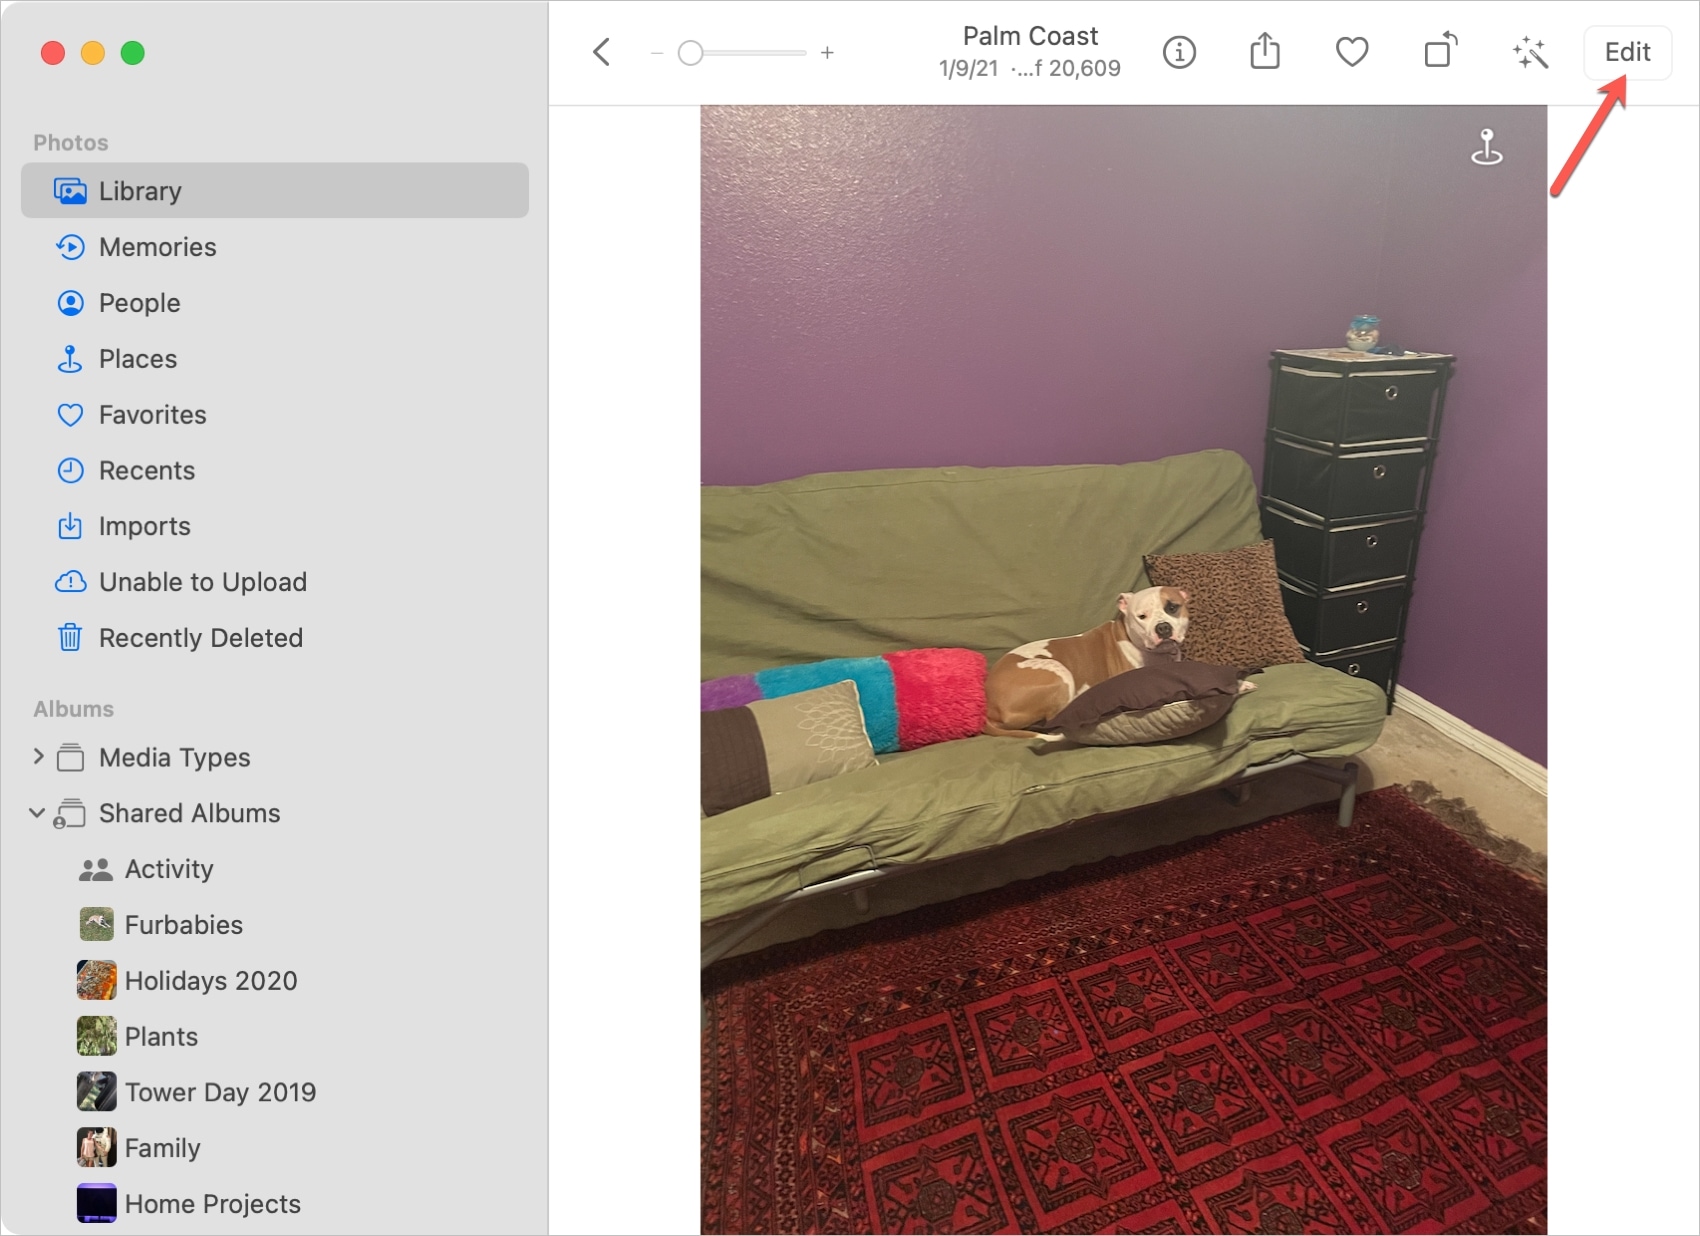
1) Launch Photos and double-click the image to open it.
2) Click Edit on the top right.
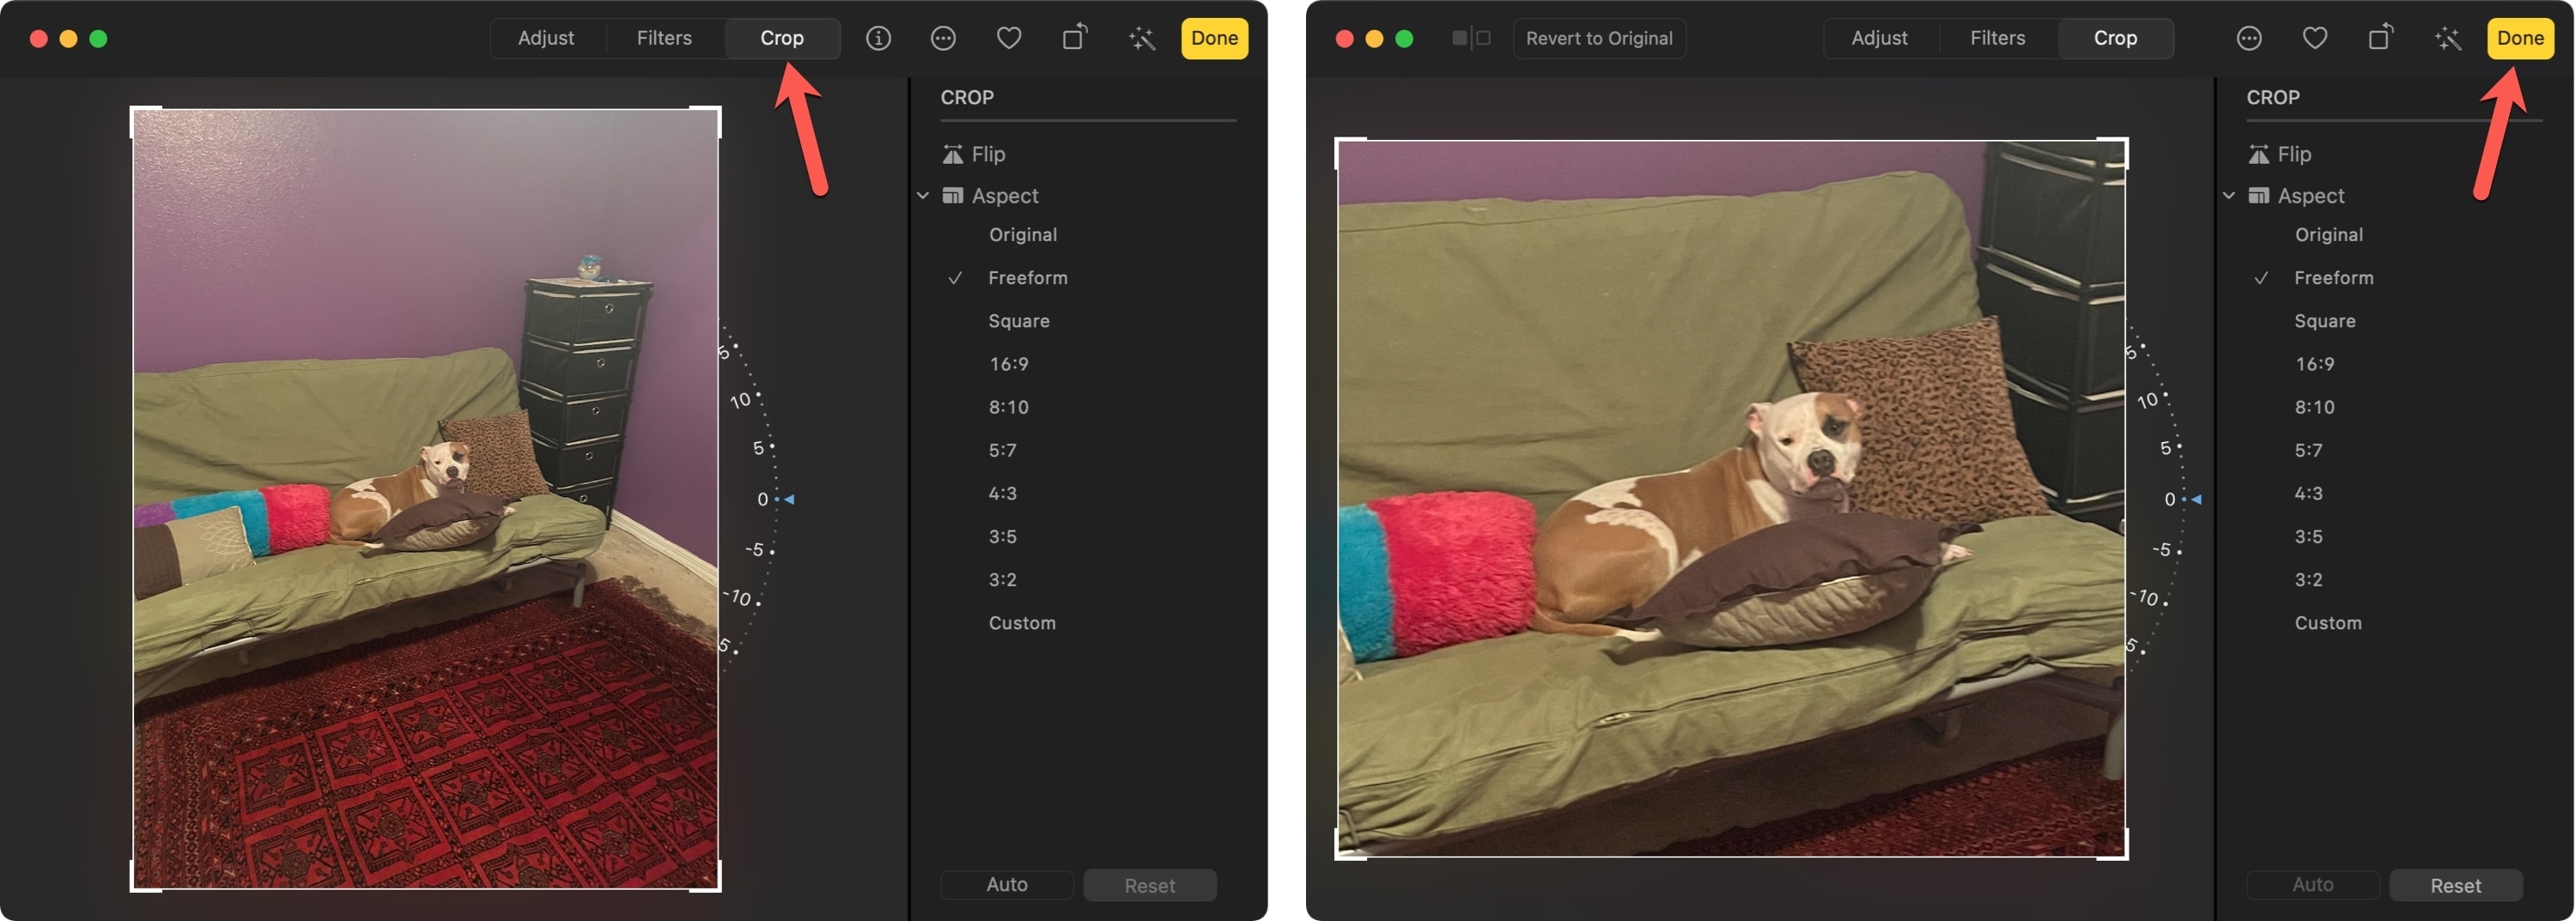
3) In the editing window, click Crop in the toolbar.
4) Drag a border or corner to retain the part of the image you want to keep. You can also use the Aspect options that display on the right side if you want a particular dimension or shape.
5) Click Done.
Keep in mind that when you edit images on your Mac using Photos, you can make other adjustments. Enhance the color, apply a filter, remove red-eye, and more.
Method 3: with Quick Look
Quick Look is a handy way to get a closer view at documents, images, and other items on your Mac. And if you're new to the feature, check out our tutorial for using Quick Look.
Similar to cropping an image with Preview, you can use Markup to crop one you view with Quick Look.
1) Open the image with Quick Look by either selecting it and pressing your Space bar or right-clicking and choosing Quick Look.
2) Click the Markup button and then the Crop button in the toolbar.
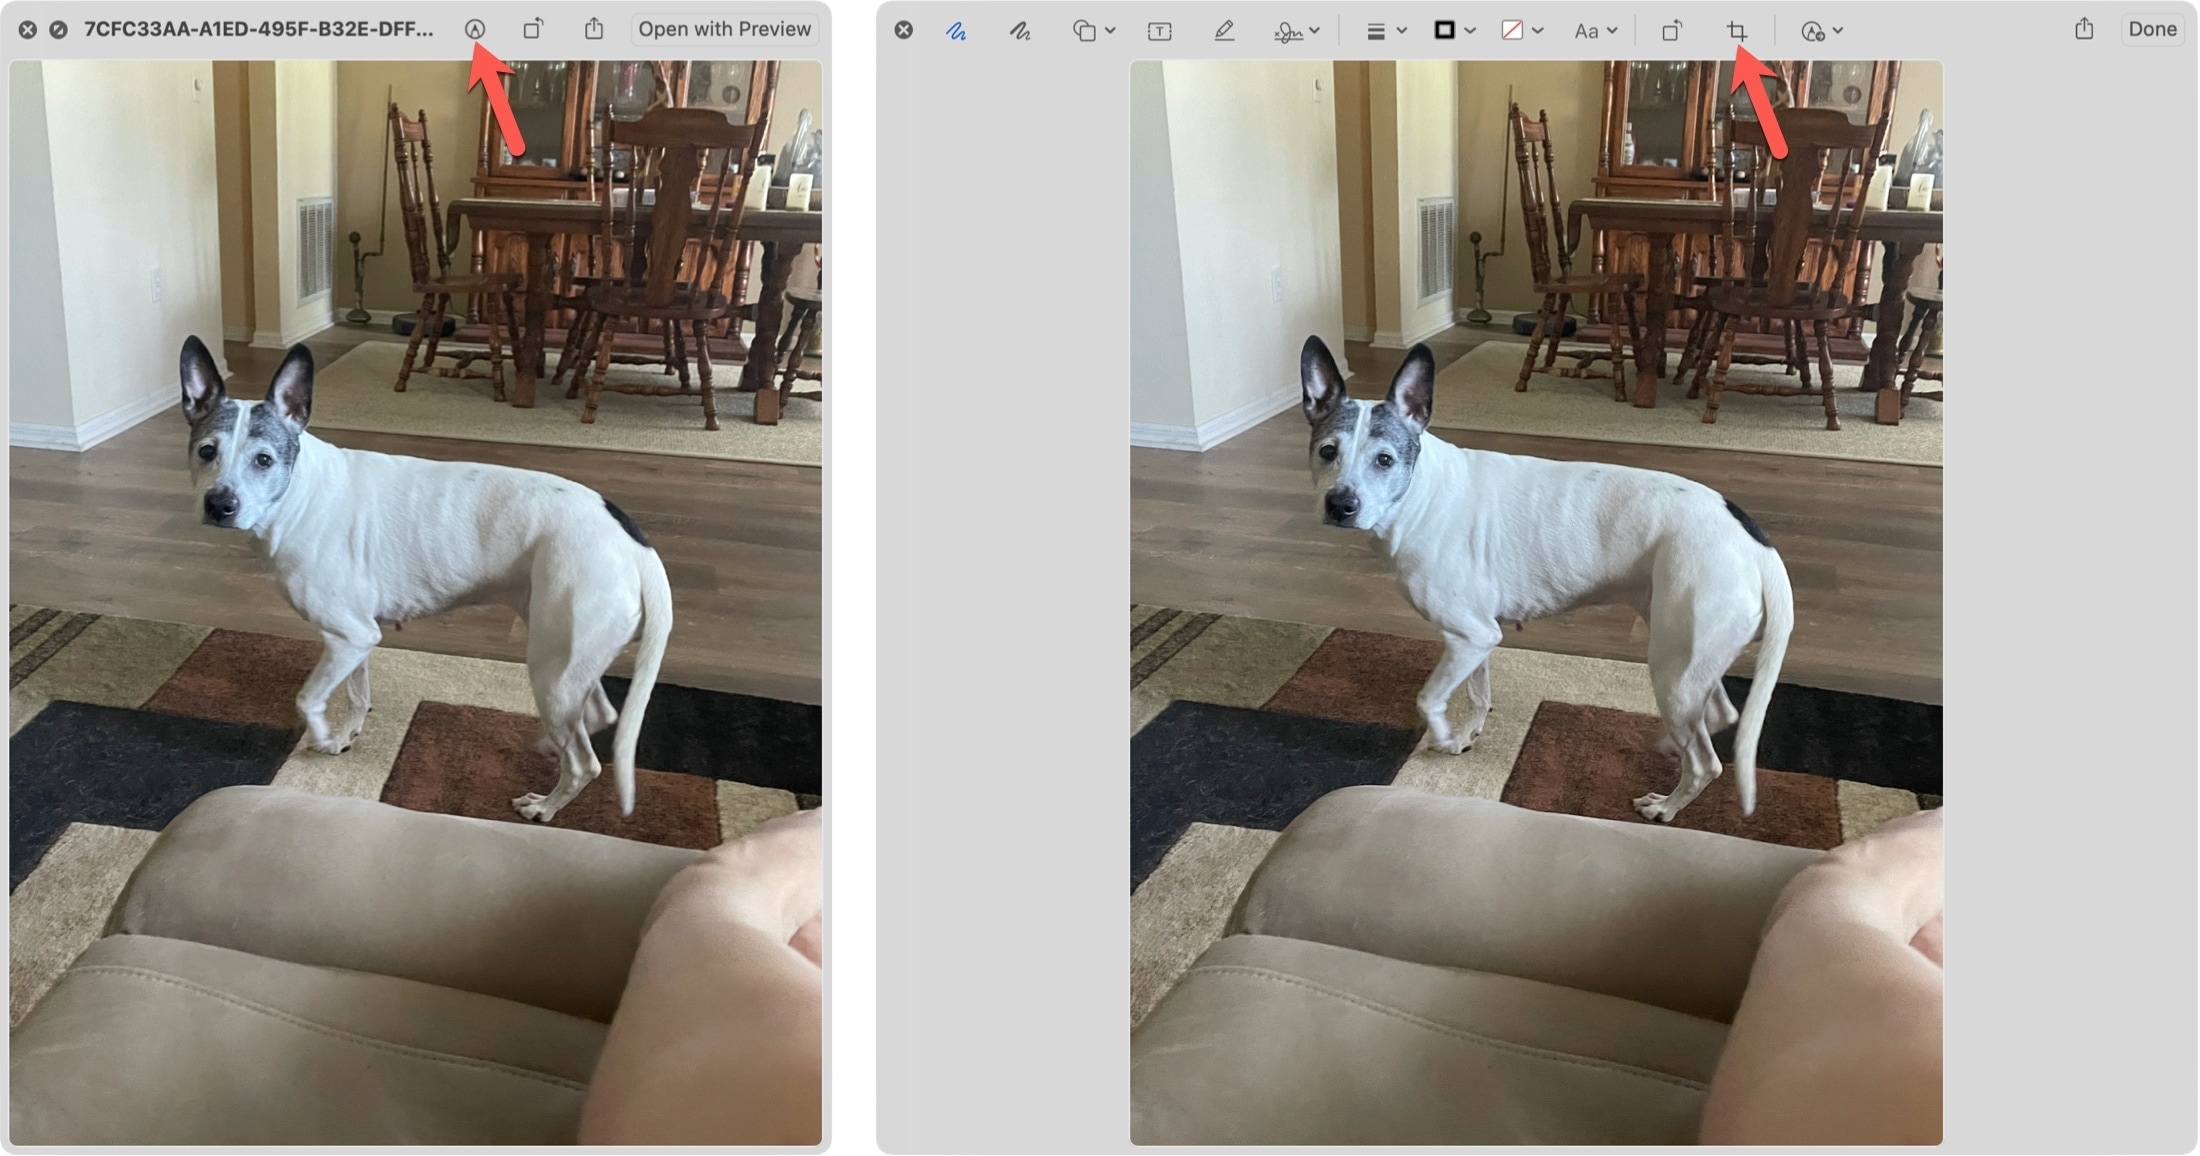
3) Drag a border or corner to select the part of the image you want to keep.
4) Click Done on the top right.
Easy, right? If you happen to be using Quick Look for a fast view of your image, then remember you can use it to crop a photo easily too.
Wrapping it up
If you don't need tons of photo editing options and just want to simply crop your image, you have three built-in tools on your Mac to do it. So use whichever is most convenient or comfortable for you.
Do you use Preview, Photos, or Quick View to make small edits to your images on Mac? If so, share your tips below or with us on Twitter!
How to Add a Border to a Picture on Mac Preview
Source: https://www.idownloadblog.com/2021/01/28/ways-crop-image-on-mac/
0 Response to "How to Add a Border to a Picture on Mac Preview"
Post a Comment